Summer Pants Tutorial
The supplies and instructions are for a 2 layers pants (silk striped fabric, and plain polyester fabric). However a simpler version can be made with only one layer. See comments in italic. There might be errors in the tutorial. Please read carefull and second guess all I write.


Supplies
- opaque fabric: 110x40 inches. Use lightweight fabric.
- sheer fabric: 110x40 inches. Optional
- lightweight interfacing: optional, for the yoke if you use one, 28x4 inches
- braid: 4 feet. You can also make ties with your fabric if you prefer
- matching thread
Pattern

Instructions
- 0.5'' seam allowance
- hem depth depends on your height.
- Cut opaque fabric. You should end up with 2 rectangles, with an opening for the crotch
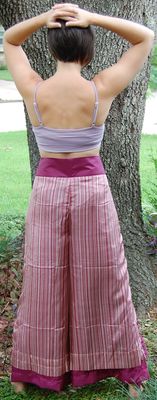
- Cut sheer fabric. Optional . This should be identical to your opaque fabric, or slightly shorter if you want the opaque fabric to show at your ankle (see photo).
- Finish edges of lateral side of opaque and sheer fabric. (Note: for the pants in the pictures, I edged the sheer fabric with a strip of opaque.)
- Stitch opaque to sheer fabric at the top (belt) and crotch only, wrong side of sheer to right side of opaque. They will be used as a single fabric from now on. Note that only the top is stiched, so that the 2 fabrics flow freely when you walk
- Stitch the 2 pairs of fabric at the crotch opening, right side together. Stitch again next to stitch line to reinforce the seam.
- Fold 0.25' and press top part of the pants, fold again 1'' and stitch.
- Insert braid or tie at each end opening, stitch to close.
- Cut opaque fabric for the yoke.
- Cut interfacing for the yoke.
- Stitch yoke fabric to pants, stitch line is 3'' below the pants edge, right sides together
- Press interfacing right next to the stitching line, on wrong side of yoke.
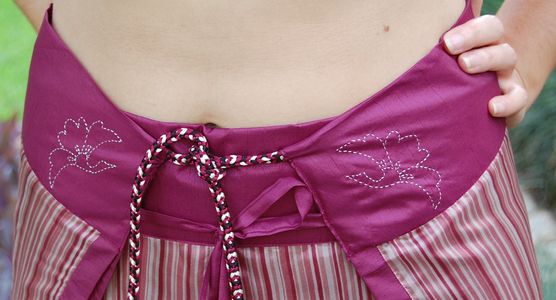
- Fold yoke over the interfacing and pants top, press, pin, then stitch in the ditch (looking on right side of pants, stitch directly on top of the yoke stitch line)
- Insert braid or tie at each end opening, stitch to close.
- Grab one piece, center at the front, right below your navel, and attach at the back
- Grab the other piece from behind between your legs, and tie at the front.