Make your own Gourd Purse
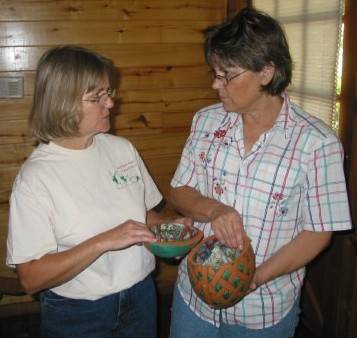
 This class was taught by Marie Mahoney at our August 14th 2004 gourd-patch meeting.
Safety tip:
It is best to use a dust mask when cleaning the inside of the gourd. some
people are allergic to the gourd dust.
These masks can be bought at hardware
stores.
Supplies:
- A canteen gourd with a nice round shape and a flat bottom.
- Mod Podge
- Paper (brown grocery store bag)
- Foam brush
- One or two hinges with screws
- Cording, 1.5 yards, for the handle
- Button
- Round corded elastic
- Drill, 1/8" and 5/8" drill bits
- screw driver
- Finish (polyurethane, lacquer, etc.)
Cutting the gourd:
Cut the gourd approximately at its 2/3.

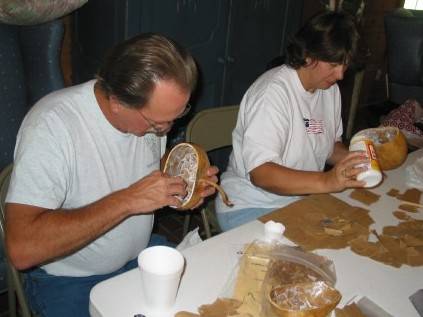
Cleaning the interior:
First, pull out as much of the material as possible by hand. Save the seeds to plant in the Spring. Many household tools can be used to clean the interior of the gourd.
You can use a grapefruit spoon, ice cream scoop, kitchen spoon, or a melon baller. You can also use a wire brush attached to a power drill. Pull of the inside nipple with pliers.
Sand the inside with sandpaper, how smooth depends on how you want to finish the inside. In this project we are lining the inside with paper so it doesn't have to be really smooth.
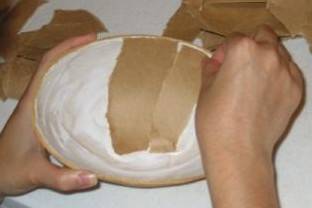
Lining the interior:
Tear small pieces of paper from the bags. Keep the straight edged pieces for the rim of the gourd. Pour Mod Podge inside the gourd pieces and use a foam brush to press the paper, carefully following the rim.
Do not put Mod Podge on the rim or the bag will not close tightly. If necessary clean the rim with a wet sponge before the glue dries, or remove with a razor blade.
Three coats of Mod Podge will give a nice tough lining, let dry and sand between each coat, then seal with a waterproof finish (clear lacquer).
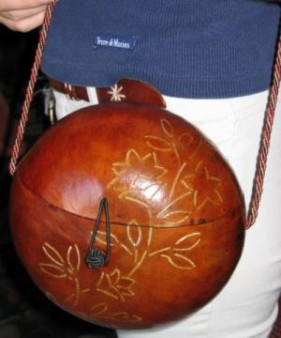
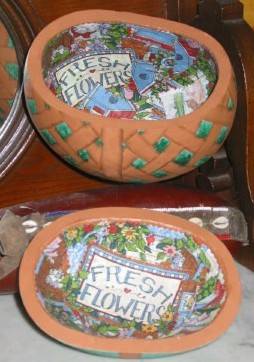
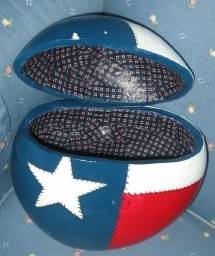
Decorating the outside:
The decoration is up to you, you can paint, carve, wood burn. Possibilities are endless.
If you are painting the gourd a light color, you may want to put a coat of Kilz on your gourd first. Then paint the inside of the gourd any color that will blend with the outside design.
I use acrylic paints, but you can also use a spray paint.
Let the paint cure for at least 24 hours. Finish the outside with 3 coats of Deft clear brush-on lacquer, which can be found at most hardware stores. Be sure to follow the directions on the can.
Assembling the gourd:
Drill holes as described in the drawing, in front for the knots, in the back for the hinge, one
larger hole on each side for the handle. If the screws for the hinges are too long cut off the excess with a Dremel.
One large hinge is better than 2 small, the curve of the lid will make it difficult to open the 2 hinges completely.
The handle is made of 1.5 yards of cording, which can be bought at any fabric store. Put each end through a hole on the side of the purse and tie a knot on the inside. I put some glue on the knot to keep it from fraying.
Put a piece of corded elastic or a pony tail holder through the hole on the front of the top of the purse, tying a knot on the inside of the purse. You can use the stem to hook the purse close if your gourd as a strong one, but it
may not last long. You can replace the stem by a button, drill a hole on each side of the stem and fix the button with a corded elastic.
Other ideas
- Bill and Clara who have been to the leather factory in Missouri City propose to use a leather
shoulder strap, and super glue a leather hinge to attach the top to the
body. The leather hinge will have to be sturdy enough, otherwise it may start to sag after some usage.
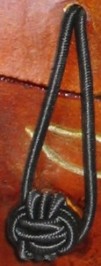
- To close her purse (on top) Claire made a Monkey-Fist knot with a black elastic cord.
A regular chinese button knot would do as well, but may have to be doubled to be large enough.