Hammock Chair
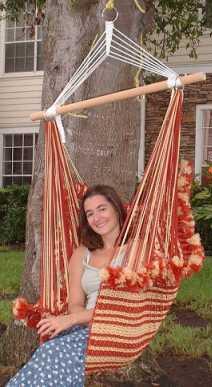
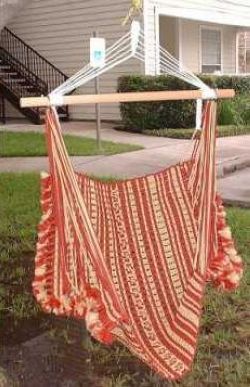
I couldn't find a pattern on the internet for a hammock-chair so it is a
personal design. I decided to make very tight knots compare to the first
hammock, because I do not like to feel like a fish caught in a net.
It took me a week and a half, working 2 hours the evening in week-days, and a lot more during the week-end.
There are more than 2300 knots in this design, take your time.
I used polypropylene Bonnie-Braid Cords, "wine" and
"harvest", 6mm, 400 yards in each color. You can purchase them at
Carol's
rug. It's a little rough to the touch and expensive
but there are more colors to choose from than with nylon seine twine from a
boating store. The knots used are : Lanyard knots (to attach the cords to the dowel), clew knot (the triangular knot below the top
ring), square knots (for the hammock itself), and Josephine knots (for the middle vertical line).
If I had to do it again I would change how I connect the sides of the chair to the bar, I have left too many cords and it is cumbersome.
Supplies:
- 400 yards of 6mm "wine" Bonnie Braid polypropylene cord
- 400 yards of 6mm "harvest" Bonnie Braid polypropylene cord
- white nylon seine twine for the clew knot
- 3x 3" welded metal rings
- 1x dowel large enough to support your weight
- 4x wood/metal pegs to keep the rings in place on the dowels
Step 1: Cut the cords
You will need to cut the cords in the following manner:
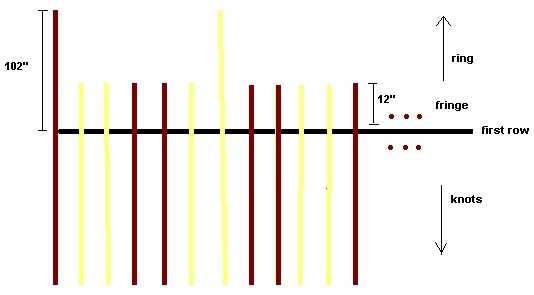
- 13x 330 inches wine, for the cords that will go to the rings
- 65x 150 inches wine
- 13x 330 inches harvest, for the cords that will go to the rings
- 65x 150 inches harvest
- 6x 40 inches white for the top clew knot
PLEASE NOTE: When cutting the cords, the ends have a tendency
to fray. A quick way to avoid this is to lightly burn the ends together with a lighter, keeping an old
rag or towel handy to clean the black "goo" from the ends.
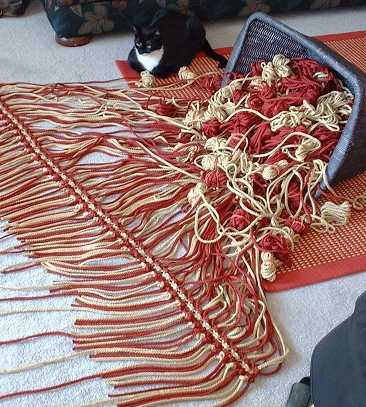
Step 2: Knot the first row.
The hammock has a rectangular shape:
- 39 columns = groups of 4 cords, wine-harvest-harvest-wine
- 57 rows of alternating square knots, the 29th is a row of Josephine knots
1 out of 6 cords will go to the ring, those are longer (330 inches):
Step 3: Knot the rectangle
Use alternate square knots to create lines of different thickness and color:
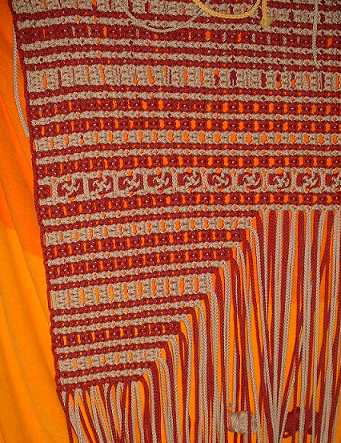
The central line is made of Josephine knots ('8' shaped knot), without it the succession of lines would be boring.
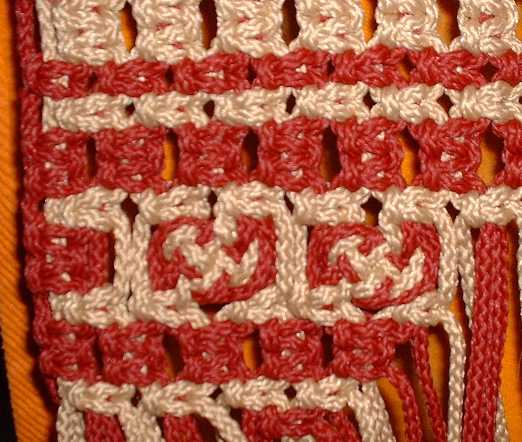
Since the knots are tight you can hang the hammock vertically when you knot.
Step 4: Attach the rectangle to the side rings
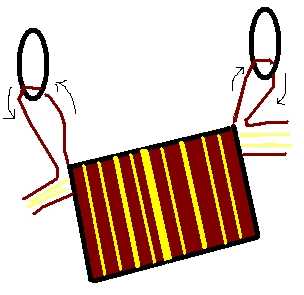 |
This is the tricky part. Take the long cords (1 out of 6) on each end of the rectangle and pass them inside the 2 rings. Try to adjust the length of the
cords when you begin to tie the first row of the fringe. Once you have the first row done, check your length again with a weight in the hammock (untie the knots as
necessary).
Once your cords are in place, finish the fringe with few more rows of alternate square knots. Tie each group with a stopper knot.
|
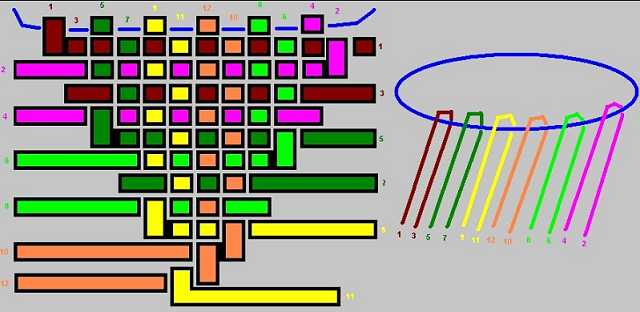
Step 5: Clew Knot
Pass the 6 white cords inside the last ring and begin the clew knot. Once you get the trick it's pretty simple, just weave your cords (above-under-above-under...) as
numbered in the drawing below, once you weaved with a cord it's no longer used in the knot:
Step 6: Finish
Attach the 12 white cords to the dowel with Lanyard knots, near the 2 rings, and secure with a braid or a fringe. Put wood or metal pegs on the dowel to stop the cords
and rings from sliding.
Try your chair.
