Bird Nest Bag

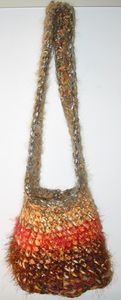
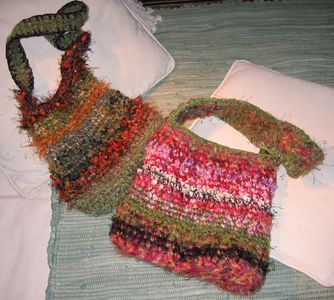
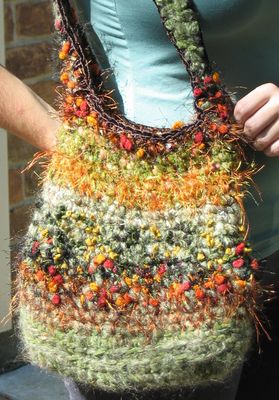
Clara Willibey taught me how to make these beautiful crochet bags, based on the work of Myra Wood.

The pattern below is a guideline: I'm not an expert in crochet or sewing and my description is at best approximate. However this is free-form crochet, the difficulty lies more in choosing the colors/texture than in actually making it. If you lose or gain a stitch it won't show, and it is very easy to lose a stitch when using fluffy hairy novelty yarn (trust me).
You will need approximately 6 hours to complete the bag, more if you decide to line it.

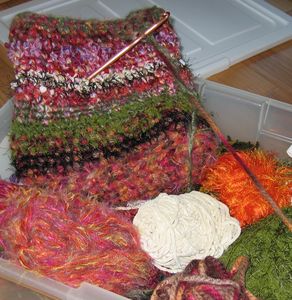
The trick to get the bird's nest distinctive look is to crochet with several yarns together, this creates a nice blend. Pick one yarn that you will use throughout the entire bag, as an unifying element.

Materials Required:

Step 1: The Base

For the base, pick 2-3 strong yarns, rather on the dark side of your color palette. Chain 15 stitches. Chain 1 and single-crochet along one side of your chain. Slip stitch at the end of the row. Then chain 1 and single crochet along the other side. Continue like this for 3-4 rows, until you have a nice oval shape, add stitches at the end of a row whenever you need it to make sure the base lays flat. Check often for flatness.

Step 2: The sides

For 2 laps, single crochet in the back loop, so that your bag starts turning upward. Keep you main yarn and change some or all of the others. Keep single crochet around until you've reached the height you want for the bag. Make sure you do not lose too many stitches along the way, but it might not be a bad thing anyway. I like to have the bag slightly larger at the base.

Step 3: The handle

Look at your bag, turn it inside-out and check which side you prefer. If you used feathery yarns the feathers might have gathered more heavily on one side.
Pick strong yarns for the handle, start on one edge of the bag (the handle should be parallel to your body). Alternate rows of 5 stitches (the base of the handle can be wider, in that case write down the sequence of stitches so that you can do the same at the other end), until you have the desired handle length.
Lay your bag flat on the table to center the handle on the other side. Connect with slip stitches.

Step 4: The rim

Pick a contrasting yarn and single crochet all around the opening. Use a smaller hook.

Step 5: Final touch

Gather all lose ends on the inside, secure and cut.
Add a big bead on one side and tie a loop with a nice cord on the other side, to close your bag. Check my Kumihimo page for ways to create nice cords.
You can also line your bag. If you want a stiffer base, cut a piece of fusible interfacing (thick) the size of your oval base. Fuse in place. Then work on your lining.